When it comes to cooking, whether you’re grilling a steak, roasting a chicken, or baking a cake, the key to achieving perfect results every time lies in precision. And one of the best tools you can have in your kitchen arsenal is a cooking thermometer. With so many cooking techniques and different types of food, a thermometer helps you avoid overcooking, undercooking, or ruining your meals. In this comprehensive guide, we’ll dive into the importance of cooking thermometers, the different types available, and tips on how to use them to cook like a pro.
Why You Need a Cooking Thermometer
Precision is the cornerstone of great cooking. While many recipes may offer cooking times or visual cues for determining doneness, these are often inaccurate. Cooking thermometers are the most reliable way to ensure your food is cooked to perfection. Here are a few reasons why using a cooking thermometer is essential:
- Food Safety: A thermometer ensures that meat, poultry, and other foods are cooked to a safe internal temperature, preventing foodborne illnesses.
- Achieve Ideal Doneness: Whether you like your steak rare or well-done, a thermometer helps you cook meats exactly to your liking.
- Consistency: Once you know the perfect cooking temperature for your favorite dishes, you’ll be able to recreate them with consistency every time.
- Prevent Overcooking: Overcooking is a common issue, especially with delicate meats or baked goods. A thermometer lets you know when your dish is done, so it’s cooked to perfection, not beyond.
Types of Cooking Thermometers
There are several types of cooking thermometers, each designed to meet different needs in the kitchen. Here’s a breakdown of the most common types:
1. Instant-Read Thermometers
Instant-read thermometers are perfect for quick checks and provide readings within seconds. These are ideal for grilling, pan-searing, and roasting. They’re small, portable, and simple to use.

Pros:
- Fast readings (usually within 3–5 seconds)
- Compact and easy to handle
- Ideal for a quick temperature check during grilling or roasting
Cons:
- Not designed to stay in food while cooking (you need to check the temperature during cooking)
2. Probe Thermometers
Probe thermometers come with a metal probe that stays in the food throughout the cooking process. These are great for larger cuts of meat, like roasts, or for slow-cooked dishes. Some models come with a digital display that can be placed outside the oven or grill, so you don’t have to open it.
Pros:
- Can stay in the food during cooking, allowing you to monitor temperature continuously
- Ideal for slow-cooked dishes and roasts
- Some models come with alarms that alert you when the food reaches the target temperature
Cons:
- More expensive than instant-read models
- Some models can be a bit bulkier
3. Oven-Safe Thermometers
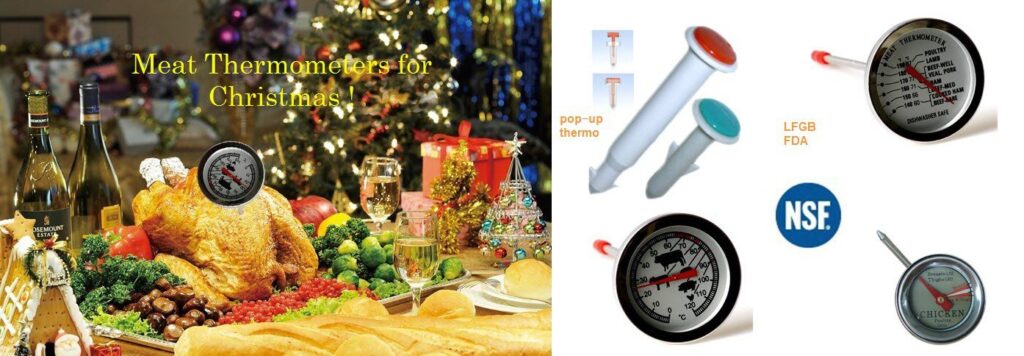
Oven-safe thermometers are designed to withstand the high heat of an oven or grill. These can be left in the food while cooking and often feature a dial for temperature reading.
Pros:
- Can stay in the oven or grill throughout the cooking process
- Durable and often affordable
Cons:
- Slower readings compared to digital instant-read models
- May be less precise than more advanced thermometers
4. Candy and Deep-Fry Thermometers

Designed specifically for high-temperature cooking, these thermometers are used to measure the temperature of oil for deep frying or boiling sugar for candy-making. Their long probes allow for deep insertion into the cooking medium.
Pros:
- Ideal for high-temperature cooking
- Accurate readings for deep frying and candy-making
Cons:
- Not suitable for other types of cooking (e.g., meat or baked goods)
- Can be difficult to read when inserted into food
How to Use a Cooking Thermometer
Using a cooking thermometer is simple, but there are a few tips to keep in mind to get the most accurate readings:
- Insert the Thermometer Correctly: For meat, insert the thermometer into the thickest part of the food, making sure not to touch bone, fat, or gristle. For whole poultry, insert it into the thickest part of the thigh, avoiding the bone.
- Check Multiple Points: For large cuts of meat, check the temperature at multiple points to ensure even cooking.
- Know the Ideal Temperature: Different foods require different internal temperatures. Here’s a handy guide:
- Beef, Lamb, and Veal (steaks, roasts):
- Rare: 120–125°F (49–52°C)
- Medium-rare: 130–135°F (54–57°C)
- Medium: 140–145°F (60–63°C)
- Well-done: 160°F (71°C) and above
- Pork:
- 145°F (63°C) with a 3-minute rest time
- Poultry:
- Chicken and Turkey: 165°F (74°C)
- Ground Meat:
- Beef, Pork, Lamb: 160°F (71°C)
- Poultry: 165°F (74°C)
- Baked Goods:
- Cakes: 190–200°F (88–93°C)
- Bread: 190–200°F (88–93°C)
- Beef, Lamb, and Veal (steaks, roasts):
- Let It Rest: After removing food from the heat source, let it rest for a few minutes. The internal temperature can rise by 5–10°F (3–6°C) during this time, and the juices will redistribute, making the food more tender and flavorful.
Tips for Choosing the Right Cooking Thermometer
When selecting a cooking thermometer, here are a few things to consider:
- Accuracy: Choose a thermometer that provides a precise reading, with a tolerance of 1–2°F (0.5–1°C).
- Speed: If you need quick temperature checks, look for an instant-read thermometer that provides results in 3–5 seconds.
- Ease of Use: Look for a thermometer that’s easy to read, especially in low light. Digital thermometers with a large, clear display are often the best option.
- Durability: Consider a thermometer that’s built to withstand high temperatures and frequent use.
- Price: There’s a thermometer for every budget, from affordable analog models to advanced digital thermometers with features like alarms and wireless capabilities.
Common Mistakes When Using a Cooking Thermometer
While using a cooking thermometer is straightforward, there are a few mistakes that can lead to inaccurate results:
- Not Calibrating Your Thermometer: Over time, thermometers can lose accuracy. Test your thermometer in boiling water (212°F or 100°C) or ice water (32°F or 0°C) to ensure it’s calibrated properly.
- Not Cleaning the Thermometer: Clean your thermometer between uses to prevent cross-contamination, especially when cooking different types of food.
- Placing the Thermometer Wrong: Make sure the probe is in the thickest part of the food, away from bones, fat, or gristle. These can affect the reading.
Conclusion
Cooking thermometers are essential tools that elevate your cooking by providing precision and accuracy. Whether you’re roasting a turkey, grilling a steak, or baking a loaf of bread, a thermometer ensures that your food is cooked to perfection, every time. By understanding the different types of thermometers available, how to use them effectively, and selecting the best one for your needs, you’ll be able to create meals with confidence.
For the best in precision and quality, consider investing in a CopperAtkins cooking thermometer. With advanced features and ease of use, it’s the perfect companion for both beginner and experienced chefs. So, the next time you’re in the kitchen, make sure to grab your thermometer — and cook like a pro!
4o mini

Leave a Reply